7. Assets
New in version 16.02.
Changed in version 17.02.
7.1. Asset Overview
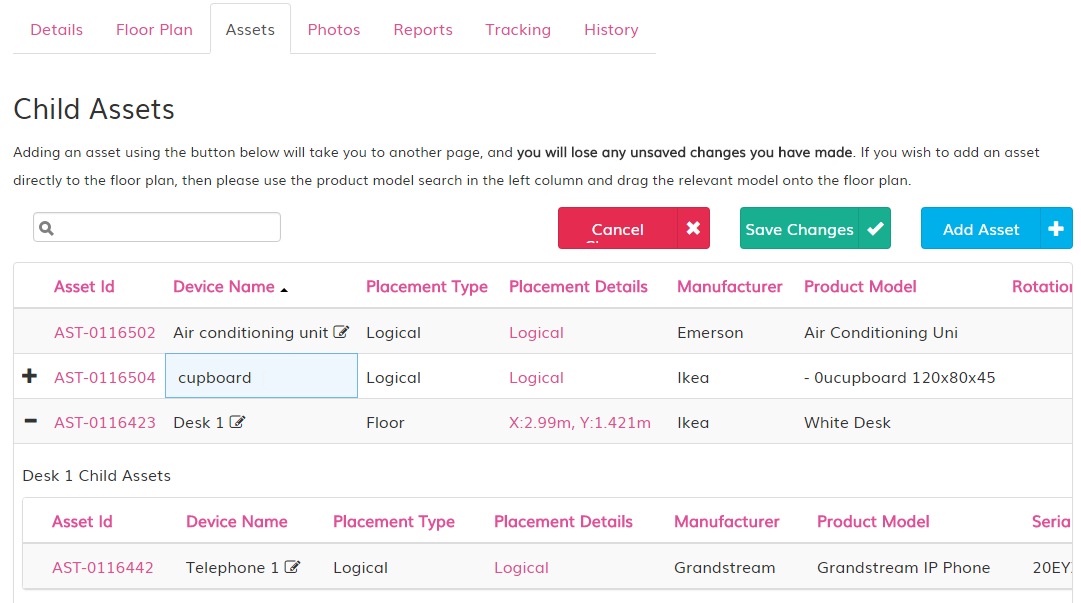
Assets can be added against either Locations or Parent Assets.
Data can added, edited and removed in a number of ways:
- Using the TRACKIT Web Client.
- Added via the TRACKIT Import Asset Import.
- Via the TRACKIT RESTful API
7.2. Placement Types
There are a number of methods of placing Assets in TRACKIT.
| Placement Type | Main Location | Cell/Grid Placement | Parent Asset | Mount Location | Offsets | Rotation/Orientation | U Position | Mounting Area |
|---|---|---|---|---|---|---|---|---|
| Floor Mounted | Required | Required | Required | Required | ||||
| Rack/Cabinet Mounted | Required | Required | Required | Required | Required | Required | ||
| Asset Mounted | Required | Required | Required | Required | ||||
| Basic Placement | Required | Optional |
7.3. Adding Assets
The Add Asset button is available in a number of places through TRACKIT, usually in the Sidebar. Once selected, the Add Asset Form is presented, the User can complete this to Add an Asset to the database.
The Add Form comprised 3 parts:
- Step One - Basic Details and Placement Type
- Step Two - Product and Placement/Parent Details
- Step Three - Additional Information
7.3.1. Basic Details
This first step asks for some basic information on the Asset Name, any Serial or Asset Numbers.
It also requests the User add what Placement Type to use. This will determine what Products and Placement detail to collect on Step 2.
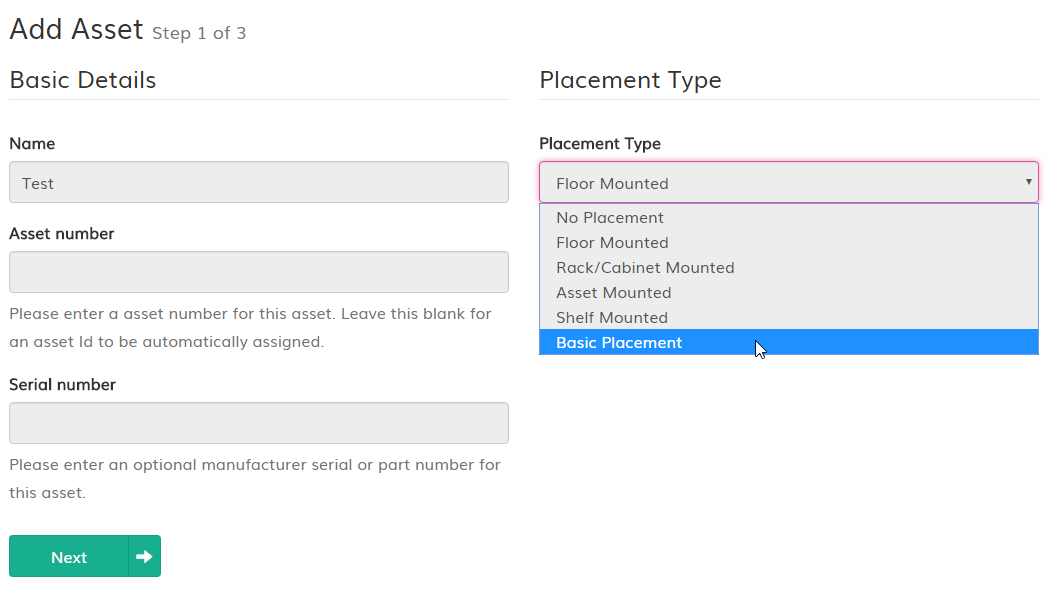
Step 1 of adding an Asset showing the different Placement Types
7.3.2. Product and Placement Details
The next step requires the User to select the Product to use for the Asset.
Depending on which Placement Type was selected, any additional Placement Types data might be required at this step.
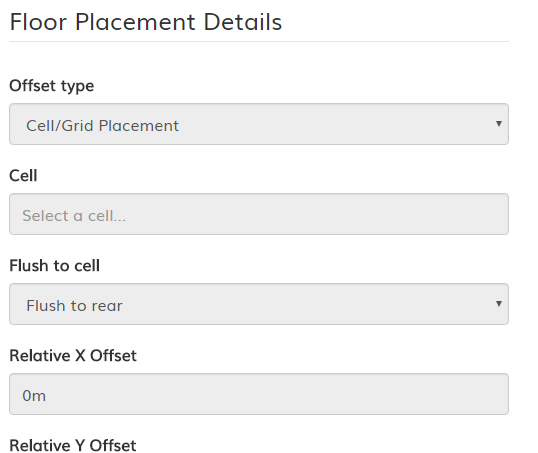
An example of Floor Placement required fields in Step 2 of adding an Asset
7.3.3. Additional Information
The final step allows the User to complete additional data fields. These typically include EAV fields for Assets.
The Add Asset Form will validate the data at each step and warn the User if there are any issues. Once completed, the Asset will be added to the system.
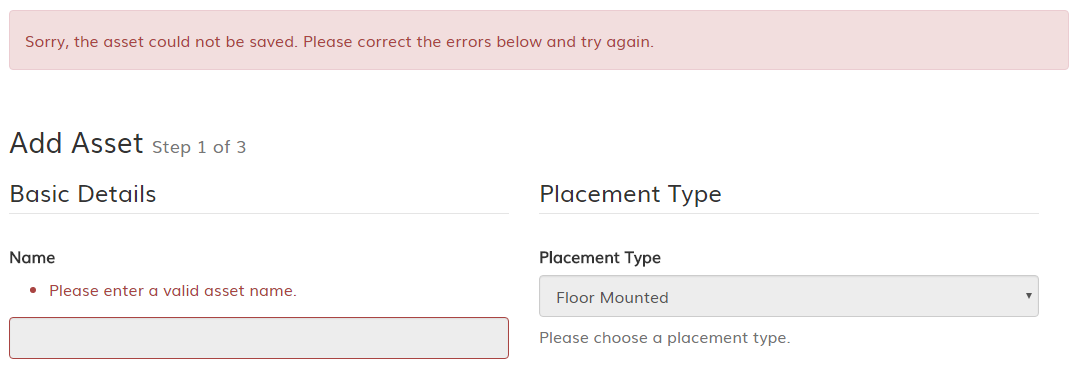
An example of form validation on adding an Asset
7.4. Editing Assets
7.4.1. Edit Asset Button
When viewing an Asset, the Edit Asset button is visible in the Sidebar. This will take the User through the 3 steps of the Basic Details Add Asset form, however any existing data is pre-populated.
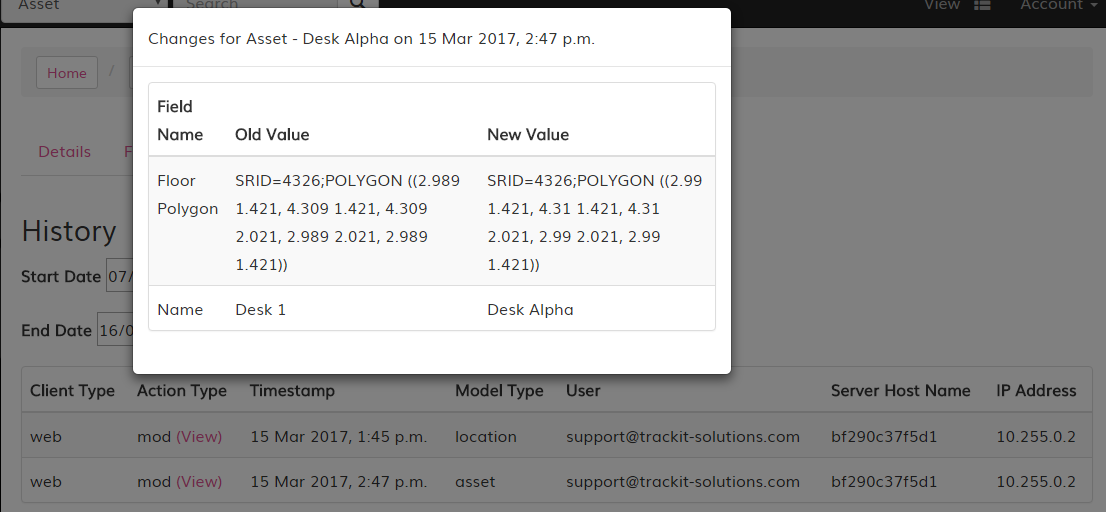
Viewing the details of an Asset Edit in the History tab.
7.5. Deleting Assets
Assets can be deleted from TRACKIT, however they cannot be restored once deleted.
It is highly recommended that Assets are instead moved to a Decommissioned or Remove Location which can be reported on and retains the History of the Asset through it’s lifecycle.
7.5.1. Delete Asset Button
Should it be a requirement to delete an Asset, it can be done by selecting the Delete Asset button visible in the Sidebar when viewing an Asset.
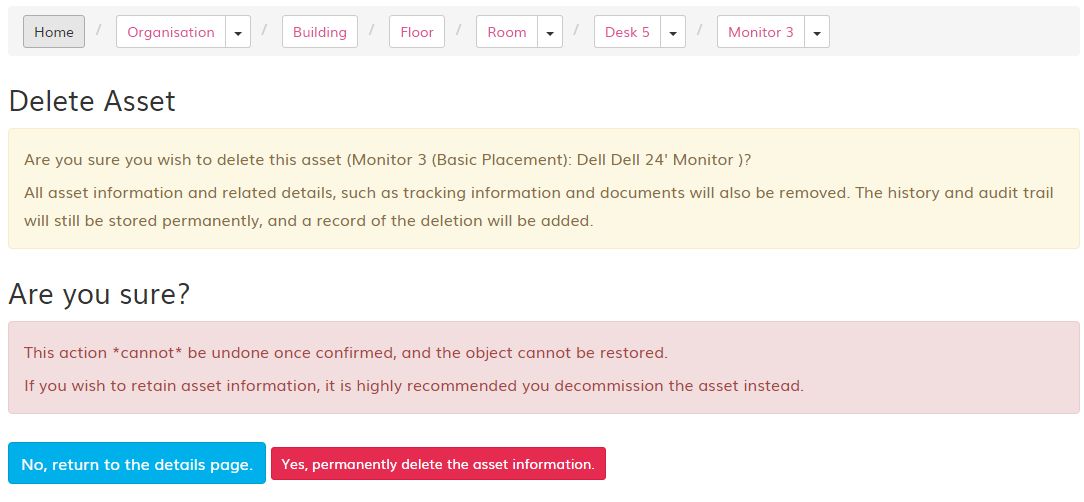
Confirmation and Warning message when Deleting an Asset.
Deleting an Asset will remove all Child Assets and should only be done where there is an error and/or the History of the Asset is not required.